Sunday, November 16, 2014

Extract Sour Stout on Blackberries and Beach Plums

After 200 all-grain beers, it is nice to take pictures of a different process.Everyone knows that malt extract is what gives beers that gross “homebrew” flavor. The reason is that the malt flavors become too concentrated and ummm… as a result becomes oxidized by the Maillard reactions during storage? Seriously though, most of the off-flavors many homebrewers remember from their early batches were a result of issues with the concentrated boil, sanitation, or fermentation. With a full boil and the benefits of an experienced brewer’s fermentation process, extract batches can be every bit as good as all-grain! However, what you gain in ease of brewing, you give up in control. As a result, malt extract is best used for beers in the middle of the fermentability spectrum, golden or darker, and not driven by a characterful base malt.

While I’ve brewed a few delicious clean beers with extract over the years (like a hefeweizen and Belgian single), I’d never brewed a sour beer based on malt extract (although I have augmented with it). I decided to use it to evaluate the pack of Wyeast Oud Bruin Blend I had in the fridge. The blend, released as a summer 2014 VSS, combines brewer’s yeast and Lactobacillus. It is intended to turn out a drinkable sour beer in about two months, without attenuation as high as their similar De Bom Blend.

A pack of Wyeast Oud Bruin Blend.This recipe was inspired by the cherry variant of our sour bourbon-barrel porter that our barrel group brewed in 2010. I steeped the specialty malts in 165F water to extract their flavor. Unlike all-grain mashes where the enzymes from the base malt convert the dextrins in specialty malts (including caramel/crystal) into fermentable sugars, extract based beers retain these unfermentables into the fermentor. Hopefully those long-chain sugars provide some sweetness and body to balance the mild roast from the chocolate rye and ~300L roasted barley. For extracts I opted for rye LME and wheat DME. The extra proteins in each should help fortify the body.

Instead of sour cherries I selected 3.75 lbs of frozen blackberries. Blackberries don’t impart as distinct a flavor profile as cherries or raspberries. They are more generically fruity/winey, meaning they integrate without dominating. I had great luck with them in my first batch of Flemish red. I also tossed in a pound of beach plums harvested from my parents’ backyard (just a few yards from the mead pit). Instead of bourbon, I added oak cubes soaked in calvados along with one ounce of the remaining oak-infused liquor. It should be a unique flavor combination if nothing else!

I’ve got ingredients for an extract lambic I'm planning to brew soon as well! Closer to my standard fermentation process, and leaving the extract flavor a bit more exposed.

Soured stout racking onto blackberries.Sour Stout on Blackberries

Recipe Specifics
-------------------
Batch Size (Gal): 5.25
Total Grain (Lbs): 8.55
Anticipated OG: 1.055
Anticipated SRM: 30.8
Anticipated IBU: 5.6
Brewhouse Efficiency: 50 %
Wort Boil Time: 40 Minutes

Grain/Extract
----------------
38.6% - 3.30 lbs. Briess CBW Rye LME
35.1% - 3.00 lbs. Munton's Wheat DME
8.8% - 0.75 lbs. Weyermann CaraMunich II
5.8% - 0.50 lbs. Weyermann Chocolate Rye
5.8% - 0.50 lbs. Briess Roasted Barley (300 L)
5.8% -  0.50 lbs. Briess Extra Special

Hops
------
0.50 oz. Czech Saaz (Pellet, 3.50% AA) @ 35 min.

Beach plums right after harvesting.Extras
-------
0.50 Whirlfloc @ 15 min.
0.50 tsp Yeast Nutrient @ 15 min.

Yeast
------
WYeast 3209-PC Oud Bruin Blend

Water Profile
----------------
Profile: Washington, DC

Mash Schedule
-----------------
Steep - 165 F for 30 min.

Notes
-------
Brewed 10/12/14

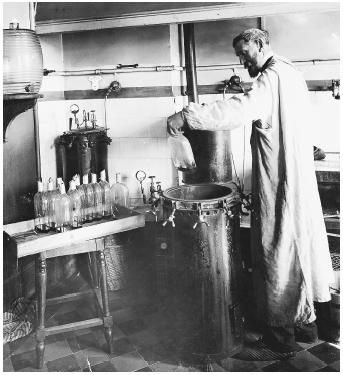
Stepped crushed specialty malts in 3 gallons of water starting at 165F for 30 minutes. Topped off with more filtered tap water with 2 g of CaCl.

Chilled to 73F. Shook briefly to aerate, pitched the yeast blend directly from the package.

11/10/14 Transferred five gallons of tart stout onto 3.75 lbs of frozen Whole Foods organic blackberries, and calvados soaked oak (6 cubes plus 1 oz of the steeping liquid)!

11/14/14 Added 1 lb of frozen beach plums harvested on Cape Cod in September.

12/16/14 Moved to basement. Around 50F, likely cold enough to preserve some sweetness.

1/29/15 Kegged, force carbonated. FG 1.012 (78% AA, 5.7% ABV). pH 3.67.

3/5/15 Tasting notes. Not as dark or stout-flavored as I expected (too light on the dark malts, and steeping less efficient than I expected). Otherwise nice lactic acidity and good fruit flavor. Enough sweetness to balance the malt and blackberries.

Wednesday, November 12, 2014

Phenols and Brett - Initial Results!

A few months ago I was asked to speak at a Mid-Atlantic Master Brewers Association of the Americas (MBAA) meeting. I opted for an enhanced rendition of my 2014 National Homebrewers Conference presentation (The Influence of Mashing on Sour Beer Production - audio/slides for AHA members). The only significant complaint I received about my original presentation in Grand Rapids was that I didn't serve any beers to illustrate my points. The MBAA meeting was at Lost Rhino Brewing Co, easy driving distance, so I got brewing immediately. Glad I did because both the presentation and example beers were successes! Apparently I made enough sense to sell copies of American Sour Beers to a bunch of craft brewers (and even a couple MillerCoors guys)!

Taking a step back, on a hot July day I brewed two separate batches with identical malts and hops. For one batch I performed a single infusion mash and fermented with English Ale yeast. For the other I started with a ferulic acid rest (113F for 15 minutes), before raising to the same saccharification temperature, and then fermented with a Belgian Ale strain. The goal was to taste the influence of freeing additional ferulic acid from the malt and its subsequent conversion to spicy 4 vinylguiacol (4VG) by the yeast, compared to the control. According to the science, Brett takes 4VG and converts it into 4 ethylguiacol (4EG), a big part of the classic funky-phenolic-baryardy character.

That phenolic brewer's yeasts are more effective at converting ferulic acid to 4VG is one reason that 100% Brett fermentations tend to be less funky than their mixed-fermentation counterparts. While access to additional carbohydrates causes Brett to produce more esters (making 100% Brett beers fruitier) additional phenols are not generated in the same way.

A four month turnaround is a bit tight for a mixed-fermentation, but I did my best to speed the process along, pitching a starter of White Lab's Brettanomyces bruxellensis and naturally conditioning in the keg. Luckily there was about a gallon of each beer left in the kegs after my presentation, so I'll be able to revisit this tasting in six month or so!

Belgian/Ferulic (The Funky?)

Appearance – Hazy golden, headed towards light amber. This would likely clear up given more than a couple days in the fridge. The beautiful sticky white head trails solid sheets of lacing down the walls of the glass.

Smell – Very Belgian nose, mild spice, pear, Brett is there, but subtle. It is young, but at Brett-plus-100-days I was hoping for a little more funk. Pleasant, but not enticing.

Taste – Solid Belgian pale with Brett. Light hay, not much horse blanket (or "stallion cover" as a knock-off version of my book calls it) to be tasted. Could be drier, which should come with time. Some toasty-bready malt. Slight hop bitterness, but no real hop oil profile. Dry, but not bone dry.

Mouthfeel – Crisp body. Firm carbonation. As I hope for pale funky beers.

Drinkability & Notes – Nothing out of the ordinary, it reads as you would expect a young Belgian pale finished with Brett. Despite the time keg conditioning, it needs another few months to achieve the volume of Brett character I was anticipating.

The English/Control is on the left, and the Belgian/Ferulic is on the right.

English/Control (The Fruity?)

Appearance – Identical, if maybe a half tone darker/clearer. Same beautiful head and lacing.

Smell – This is where things get weird: big clove (aka 4VG)! The Brett is slowly working to convert the ferulic acid to 4VG, and apparently I caught it in the middle. No real funk yet, but assuming things continue like this there should be eventually.

Taste – Like a hefeweizen fermented cool with WLP380 Hefeweizen IV, very low fruit, but tons of clove and spice. No classic Brett character yet. As is the flavor is harsh and rather unappealing, especially as I was expecting this one to be fruitier. Comes across as slightly more bitter/harsh as well, almost a solvent edge.

Mouthfeel – Similar, but the carbonation is slightly higher. The primary fermentations finished at the same gravity, but I haven't checked them post-Brett yet.

Drinkability & Notes – This is why you take the time experiment (cough cough Experimental Brewing). While my original hypothesis was correct that the Belgian primary strain would accelerate the eventual production of funky 4EG, I didn’t expect the English primary strain to yield such a spicy beer at this point!

If nothing else, fermenting with a phenolic brewer's yeast seems to speed up the conversion of ferulic acid to 4EG in a beer with Brett. While I have made many wonderful sour beers with English, American, and lager yeast primary fermentations, it seems like Belgian (or hefeweizen) strains are your best bet if your goal is funk with a short turnaround time.

It will be really interesting to see where these two beers end up when the Brett characters stabilize. Will the funkiness of the English yeast primary fermentation eventually catch-up, or will there always be a difference in the level of funk? You'll find out as soon as I do!

Monday, November 3, 2014

Pressure Canning Starter Wort

Using the pressure cooker to wash the jars and lids.Why do so many homebrewers skip starters for their liquid brewer's yeast? Pitching enough healthy cells can have a greater impact on the quality of a batch than anything else you do on brew day! Maybe because from start to finish making a starter can take almost an hour. Using an Erlenmeyer flask makes the task easier, by allowing you to boil, chill, and grow in a single vessel. Adding a stir-plate creates denser yeast cultures, the result is less wort to boil and chill for a given target cell count. Still I’m lucky if I can go from getting equipment out to pitching yeast in fewer than 30 minutes. Sometimes half an hour is hard to come by on a weeknight!

I weigh the DME into each jar.Not anymore! My new pressure cooker allows me to produce a large volume of shelf-stable sterile wort at one time. I can produce enough wort for 10 starters in one afternoon. That way all I have to do to make a starter is sanitize my flask and add the wort and yeast, done! The key is the pressure (15 PSI) generated by the canner causes the wort to boil at 250F (121C), hot enough to kill Clostridium botulinum in a reasonable amount of time (it would take 7 to 11 hours in boiling water). While boiling at 212F (100C) is more than enough to kill all the microbes brewers usually worry about, this is only because we are working under aerobic conditions initially and pitching enough brewer’s yeast to quickly lower the pH and produce alcohol thus inhibiting the nasty microbe responsible for botulism. C. botulinum is all around us (mostly in dirt), but really thrives in the anaerobic environment created by boiling-water canning.

The cans with the water added as well.If you don’t have a pressure cooker/canner there are two alternatives to prevent C. botulinum from growing in canned wort. You could add enough phosphoric or lactic acid to lower the pH of the wort below 4.4. This is acidic enough to make reasonable time hot water-bath canning safe (as it is for many fruits). Alternatively, you could store the canned wort in the refrigerator, C. botulinum will not grow if the temperature remains lower than 38F (3C). Personally the risk (however small) of botulism poisoning (paralysis followed quickly by death) with these methods isn’t worth the time/money savings!

Equipment
I purchased an All-American 25 Quart Pressure Cooker/Canner a few months ago for $230. It’s super heavy-duty aluminum, and doesn't rely on a gasket to seal, so I’m expecting it to last at least the next 50 years of my brewing career. There are less expensive options, but I try to buy things that will last when I am able to. A pressure canner can also serve as an autoclave if you are planning to do sterile culturing for yeast isolation and wrangling (where sanitation isn't good enough). The All-American even looks a bit like a mini-version of the one Pasteur used. In addition you’ll need your desired-size Ball jars (which come with rings and lids) and optionally a jar lifter. That's it!

12 jars 8 oz jars in one layer, with room for another.Wort Production
You may not want to produce the same density of wort for all starter applications. I like having small jars filled with low gravity wort for harvesting microbes (8 ounce jars with 10 grams of light DME and a pinch of yeast nutrient). They are easy to take to a tasting or a bar if you want to collect bottle dregs (harvestable bottle dregs list). Pop the lid, pour the dregs in, and screw the ring back on. When you get home you can transfer the inoculated wort to a sanitized beer bottle with a No. 2 stopper and an airlock. Or simply keep the Ball jar in the fridge if you want to prevent the microbes from growing – remembering to vent the lid periodically.

The pressure canner heating.If you are planning to use the canned wort for traditional starters, Kristen England suggested canning high gravity wort (I'd keep it around 2-3 times stronger than your target starter gravity). That will allow you to can less and yield more by diluting the starters with water. It all depends on how concerned you are about the sterility of that water. I am comfortable adding bottled water directly to chilled wort without boiling/chilling. If you want starter wort that is ready to use for growing commercial brewer's yeast cultures, aim for a standard 1.040.

To reach the target gravity you can use malt extract, extra runnings from a brew, or a purpose brewed “beer” for a year’s worth of starters. If your starter wort is all-grain, I’d suggest boiling it first. At Modern Times I brewed a 3 gallon no-sparge batch that I drained directly into jars for canning. The result was the most intense DMS aroma of tomato soup I’ve ever experienced. With the high temperature and lack of steam escaping it shouldn’t have been a surprise. Not a big deal if you decant the starter wort, but it made evaluation of the microbe starters tricky until they were stepped up. Pre-boiling isn't necessary for malt extract, which has already gone through a full boil during production.

The weight, this one can be turned to the 5, 10, or 15 PSI setting.Process
Make sure to follow the instructions for your canner when it comes to processing. Start by washing all of your equipment is hot-soapy water. Rinse with warm tap water to remove all of the soap. While you're rinsing, inspect the jars and lids for chips, dents, and cracks. Don't use any that are anything less than pristine.

Fill the jars with wort or water/DME, leaving ~3/4 inch (2 cm) of space at the top of each jar (this is necessary to form an adequate vacuum during cooling). Hand-tighten the rings over the lids. The ring only holds the lid in place during processing, so it doesn't need to be too tight. Arrange the jars in the canner on the rack, trying to leave a little room around each one to promote even heating. Add hot tap water to the canner, enough to come a few inches up the jars. You can add a second level of jars on another rack if they fit. Lock the lid on the pressure canner.

Begin heating on high. Once steam is escaping from the vent, wait seven minutes, and then install the weight. At this point the pressure will slowly rise. Once 15 PSI is reached, the weight will begin to sputter, hiss, and rattle. Only now do you begin the timer (15 minutes for 8 oz jars, plus 1 minute for every 1,000 feet above sea level to compensate for the lower ambient air pressure). Adjust the heat so that the weight continues releasing pressure, but it doesn't nee to be violent. After the time is complete, turn off the heat and allow the pressure to dissipate slowly. Once the pressure returns to 0, remove the weight and then the pressure canner's lid.

The pressure gauge, nearly to 15 PSI.Once the jars cool completely, press gently in the center of each lid. If they pop up and down this indicates that the vacuum seal was not successful. The wort is these jars should be used immediately or discarded. Partially unscrew the rings on the successfully sealed jars. At this point the suction of the vacuum in the headspace is holding the lid on. If this vacuum fails to hold the lid at any point, discard the starter wort in that jar. Only use the lids once, but the jars and rings can be saved and reused as long as they remain undamaged.

At the moment I have six empty sour-beer-only carboys, so I’ll be harvesting some fun microbes. Starting with a couple raspberries still hanging on the bush in our backyard. I also have some exciting sour beers I have hanging out in the basement in need of harvesting as well (Russian River Beatification, Trillium Lineage Wheat and Rye, Cuvee de Ranke, and a bunch of gueuze).

The finished product, shelf-stable starter wort.

Feel free to post any additional tips or chili recipes in the comments!